Beginner route · Verified September 22, 2026
Warhounds Beginner Guide: First-Session Tips
Start with the aiming panel, cover and recovery. Use the animation-speed button to shorten turns, and build the Workshop to unlock the Recon Drone.
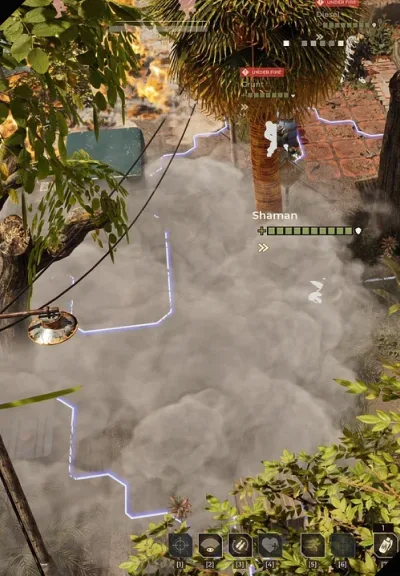
Start here · Updated September 22, 2026
What should you do first in Warhounds?
Check each shot in the aiming panel, keep soldiers behind cover, and review injuries and available funds before the next contract. Those habits connect the tactical fight to the roster you will need afterward. For faster turns, use the animation-speed button in the mission screen’s upper-right corner.
Need a drone? Since Patch 1.0.1, the Recon Drone unlocks after building the Workshop; the older requirement to sign its contract was removed.
Five useful first-session tips
- Read the shot breakdown. Aim at an enemy and inspect the panel on the right. The developer identifies soldier Accuracy, target cover, weapon distance and target position as hit-chance factors.
- Do not equate a hit with full damage. Cover can turn a successful hit into a reduced-damage graze. Compare a flank or a clearer line before spending the shot.
- Keep allies out of the bullet path. A missed bullet keeps travelling and can hit a teammate or an object. Check the line behind and around the target.
- Speed up animation when you want to. The upper-right mission button can enable or disable faster animations at any time; it is not a trainer.
- Review recovery before spending. Check who is injured or unavailable, what the next deployment needs and what the interface says treatment and equipment will cost. This is our planning advice, not a fixed build order.
These controls and combat rules are documented in the developer FAQ and ballistics explanation.
The verified core loop
Steam describes two connected layers. In the tactical layer you command a mercenary team, calculate lines of fire, flank, break cover and use high ground. Between missions you recruit, upgrade, buy equipment and manage logistics, finances, medical supplies, downtime, allies and intelligence. A sound beginner plan is therefore cyclical: prepare, deploy, recover and review.
- Prepare: match the squad and mission-focused loadout to the job.
- Deploy: read lines of fire, cover and elevation before committing movement.
- Recover: treat personnel and account for equipment, finances and downtime.
- Review: decide what the next contract requires before spending resources.
Before a mission
The official store confirms five classes and mission-focused loadouts, but it does not publish a universal best squad. Use a question-based check: what ranges must the team cover, which tools may create or deny sight lines, and which operative would be costly to lose? This is an editorial planning framework, not a claim about hidden mission rules.
For a concrete decision, compare single-shot and burst weapons against range, cover and friendly-fire paths.
Steam also describes high combat lethality and the need to treat and extract personnel. That makes preservation part of the campaign layer, not merely a score concern.
Why a good-looking shot can still disappoint
Warhounds calculates hit chance separately for each bullet. Cover affects both the chance to connect and the chance of a graze, so a burst can mix misses and low-damage hits. Use the right-side aiming panel, check range and look for a cleaner angle before committing.
The developer’s explanation does not provide a complete damage calculator. Use the current in-game values for action costs and weapon stats; the combat guide explains the confirmed rules.
Back at the base
Review injuries and medical needs first, then equipment and roster gaps, followed by budget and contract implications. Allied relationships, intel and covert operations can affect access to missions, gear and allies according to the official store. The source does not reveal exact thresholds, so treat irreversible-looking choices carefully and use in-game descriptions as the authority.
Since Update 1.0.2: read the Injured and Tired duration display in the hangar after a mission before choosing the next squad. The update also allows tutorial skipping on subsequent playthroughs; it does not describe skipping a first playthrough. Official 1.0.2 release notes, reviewed September 29, 2026. See the new base displays and rookie class selection.
Choose your next action
Verify patch-sensitive details in your game
The public sources establish the shape of the Warhounds loop, but they are not a versioned manual for every tooltip. Before relying on a recommendation, compare it with the mission briefing, class description, equipment tooltip and difficulty text visible in your installed version.
- Class and equipment rules: confirm restrictions and current values in the loadout screen.
- Combat numbers: treat displayed action costs, chances, ranges and damage as authoritative for the current build.
- Campaign choices: read the consequence text instead of assuming every contract or relationship can be recovered later.
- Technical behavior: separate a repeatable problem from a one-time symptom before trying support steps.
If you need detail on one part of the loop, use the complete guide map rather than applying a tactical answer to a roster, base or support problem.